How To Master Music
Learning how to master music is the crucial, final step in developing music production skills. Mastering ensures your track sounds polished and professional across all listening platforms.

Why Do I Need to Master My Music?
Mastering is the final step before your music is released to the world. Careful processing at the mastering stage ensures your track competes with commercial music in terms of loudness, clarity, and overall quality. Without mastering, your track might sound weak or unbalanced compared to other songs in your genre.
Proper mastering helps your music stand out on streaming platforms, radio, and various listening environments. It also ensures that your track sounds consistent whether it’s played on high-end speakers, car stereos, or through headphones. We’ll break down each of these aspects in more detail as we go along, so you can understand exactly how mastering impacts the final product.
The Mastering Process
Mastering involves several key processes that enhance and balance your mix. Here’s a breakdown:
EQ for Colouration:
Equalization (EQ) shapes the frequency balance of your track, making it sound clearer and more polished. It can add warmth to the low end, brightness to the highs, or reduce muddiness in the midrange.
Stereo Widening:
This process enhances the stereo field, making your track sound more spacious and immersive.
Compression:
Compression controls the dynamics of your track, ensuring that no part of the mix is too loud or too soft. It helps glue the elements of your mix together. Quieter parts can be lifted in the mix, and hard transients tamed.
Limiting:
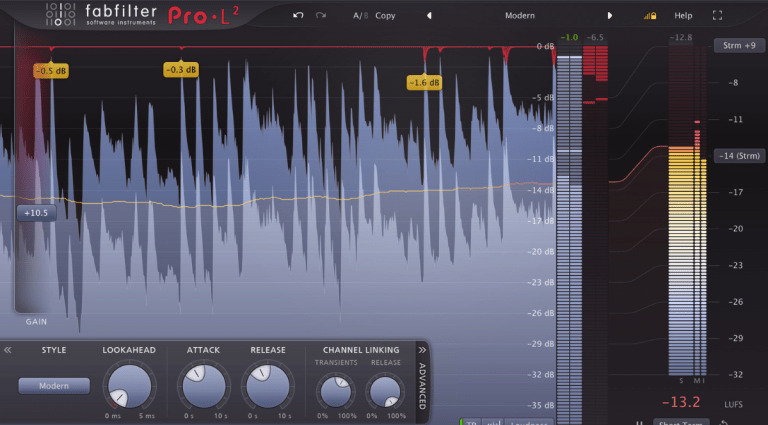
Limiting is the final step that controls the peak levels of your track, ensuring it doesn’t distort while maximizing loudness.
Character Plugins:
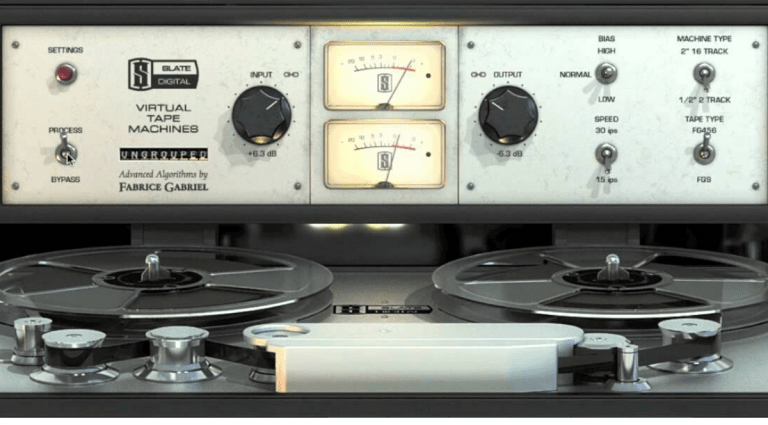
These include tools like tape saturation or vintage channel strips that add warmth, depth, and a unique character to your sound. Sometimes a mastering engineer will add hardware or plugin versions of these tools with no actual processing taking place, just so that they can add the subtle character of the device.

Setting Up Your Project
Before you start mastering, it’s important to set up your project correctly. In your Digital Audio Workstation (DAW), you’ll usually set up one channel that contains your pre-master audio (your mixed track).
From here, you have two main options for routing:
1. In-Channel Processing:
Apply all your mastering plugins directly to this channel. Once you’re happy with the sound, you can export the mastered track directly from the DAW. This method is for engineers who process and master “in the box”.
2. Mastering on a Separate Channel:
Send your pre-master audio to a new channel dedicated to mastering. This allows you to process the audio in real-time by playing the track through your mastering chain and recording the outcome. Routing this way is generally for those who have outboard mastering hardware.
Whichever method you choose, having a well-organized project setup is key to a smooth mastering process.

The Mastering Chain
The mastering chain is the sequence of plugins and effects that you use to process your track. The order of these effects can be adjusted based on personal preference, but here’s a common starting point:
1. Initial Parametric EQ:
Start with a gentle EQ to shape the overall sound. Use this to enhance or reduce specific frequencies, adding clarity and balance to your track. You are not looking to make big moves here. You may add low and high pass filters to set the frequency range of the track. You may also wish to lift bass, cut mids or boost highs to taste. The trick is to listen to the premaster and identify those frequencies which need subtle adjustment. If any particular instrument or frequency requires big moves, go back to the mix project and fix it there.
2. Compression:
Apply subtle compression to control dynamics. This step helps to even out the volume across the track, ensuring that no part is too loud or too soft. At the mastering stage, compression should be relatively light as individual tracks will have been compressed or balanced at the mix stage.
3. Saturation or Channel Strip:
Add warmth and character using a saturation plugin or a channel strip. These tools can enhance harmonics and add a pleasing analog feel to your digital audio. Routing your master out to hardware at this stage is a useful trick, if you have hardware channel strips or tape machines.
4. Stereo Widener:
Increase the stereo width of your track, making it sound more expansive. This can add depth and dimension, making the track more engaging to listen to.
5. Limiter:
Finally, apply a limiter to control the peaks and increase the overall loudness of your track without causing distortion. This is the last step in the chain and ensures that your track is loud enough for commercial release.
Experiment with the order and settings of these plugins to find what works best for your music. Remember, subtle adjustments can make a big difference in mastering. Feel free to add an EQ at the end of the chain. Remember, there are no rules other than what sounds good. Just ensure your master is not clipping after the limiter!

Referencing Your Master
Referencing your master is a critical step in ensuring it stacks up against other tracks in your genre. Have at least three reference tracks that you admire loaded into your project. These reference tracks should be from respected labels, producers and mastering houses. Compare your master with these tracks throughout the process to check for tonal balance, loudness, and overall vibe. This will help you identify any areas where your track might need adjustment, ensuring your final product is competitive and polished.
Bouncing Your Master
Once you’ve completed the processing via your mastering chain, it’s time to bounce (export) your master. The standard settings for modern music are 24-bit depth and 48kHz sample rate, but 24-bit and 44.1kHz is still widely used. Some mastering processes demand 16 bit, especially for traditional formats like CDs.
Different formats may require different specifications. You will need to spend some time studying the particular nuances of mastering for formats like tape, vinyl or CD. However, mastering for digital output is an ideal way to start your mastering journey.

Six Common Music Mastering Mistakes
Mastering is an art that takes time to perfect, but here are six common mistakes to avoid:
1. Over-Compressing:
Compression is important, but too much can suck the life out of your track. Keep it subtle to maintain dynamics and energy.
2. Excessive Limiting:
Pushing the limiter too hard to achieve loudness can lead to distortion and loss of detail. Aim for a balance between loudness and clarity.
3. Poor EQ Decisions:
Drastic EQ moves can unbalance your mix. Focus on gentle adjustments that enhance the natural sound of your track.
4. Neglecting the Low End:
If your bass frequencies are too loud or too quiet, it can throw off the entire mix. Pay attention to how your low end interacts with the rest of the track.
5. Ignoring Stereo Imaging:
Not all tracks benefit from extreme stereo widening. Make sure your track remains cohesive and doesn’t lose impact when played in mono.
6. Not Referencing Enough:
Failing to compare your master to professional tracks can lead to a finished product that doesn’t hold up in the real world. Always reference.

FAQ for Mastering
Can I Teach Myself to Master Music?
Yes, you can teach yourself to master music with practice and the right resources. Start with the basics, like understanding EQ, compression, and limiting. As you gain experience, your skills and understanding of the mastering process will improve.
How Do I Know What Levels My Master Should Be?
Aim for an integrated LUFS (Loudness Units Full Scale) between -14 and -9 for streaming platforms. Keep your peaks below -1dB to avoid distortion during file conversion. Checking the platform’s guidelines is crucial for optimal levels.
Are AI Mastering Services Worth Considering?
Online mastering services can be useful for quick and affordable mastering. However, the technology is not there yet, lacking the personalized touch and critical listening skills that a professional mastering engineer offers. For important releases, it’s worth considering a human touch.
This guide offers you a clear path to start mastering your own music. By following these steps, you’ll ensure your tracks sound professional, polished, and ready for any platform.


